


You love traveling, but your photos always come out a bit…uh… lacking. (Someone had to say it). Awkward posing, overexposure, blurred subjects—for some reason the photos you take just don’t capture the magic of your vision and the places you visit. It’s discouraging, especially when you see the photos other travelers snapped. But, don’t despair! Nobody’s born knowing how to take photos of elephants; it’s something you need to learn. Like riding a bike, and, once you know how, you won’t forget. Follow our 10 smartphone travel photography tips and you’ll be a travel photo pro in no time.
10 Smartphone Travel Photography Tips
An important note on respecting other cultures: When traveling, it may be tempting to snap photos of everything, and everyone—but that doesn’t mean you should. Some places, like sacred temples or monuments, don’t allow photography, so please be respectful and put away the phone. Don’t try to be sneaky and take photos anyway. Also, local people are people, not walking souvenirs for you to add to your scrapbook. Ideally, avoid taking photos of locals out of respect. If you absolutely must get a photo, introduce yourself to the person first and ask their permission (in their language if you can swing it!). And if they say no, don’t snap it. Now, onto the photography tips!
1) Prepare Your Smartphone
If you own a smartphone, that’s all you need to take stellar travel photos. It’s not necessary to buy any fancy photography equipment. We promise you can get amazing photos with a smartphone you already own. The way to improve your photo game is to learn and practice the techniques. There are a few things you’ll want to do to prepare your phone for travel photography:
- Clear your iPhone space! You don’t want to run out of room in the middle of your trip.
- Purchase an external battery. This way, if you can’t charge your phone during the day (there aren’t any outlets in the wild!) you won’t have to sacrifice your photo-taking.
- Keep your sticky fingers off your camera lens! We get it, you’re trying out lots of new cuisines and foods, but make sure you wipe the lens with a soft fabric or cloth before snapping away.
- Consider getting yourself a waterproof case or pouch. This will open up a ton of photo opportunities. Think: ocean kayaking and cliff diving.
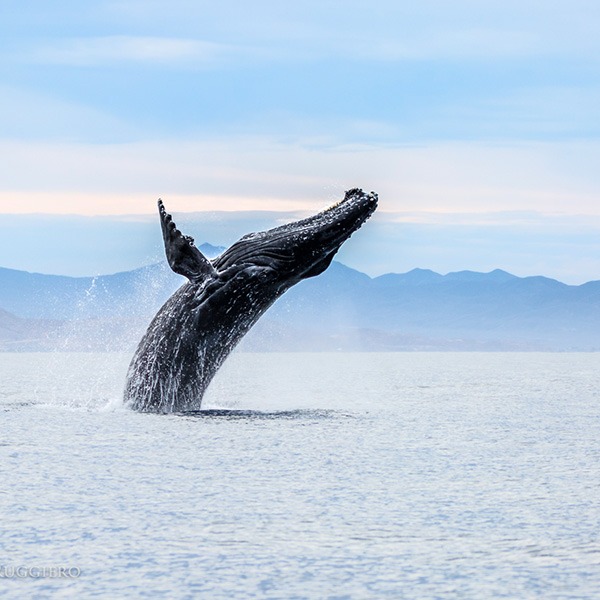
2) Get There Early
Lighting is so important. If you can, plan your trips around the best time of day for photos: the morning. And we mean the morning, morning. Like when the sun rises. That’s when the light is warm and soft, a perfect combination for a breath-taking photograph. Plus, if you get there early, there will be fewer people in the way!
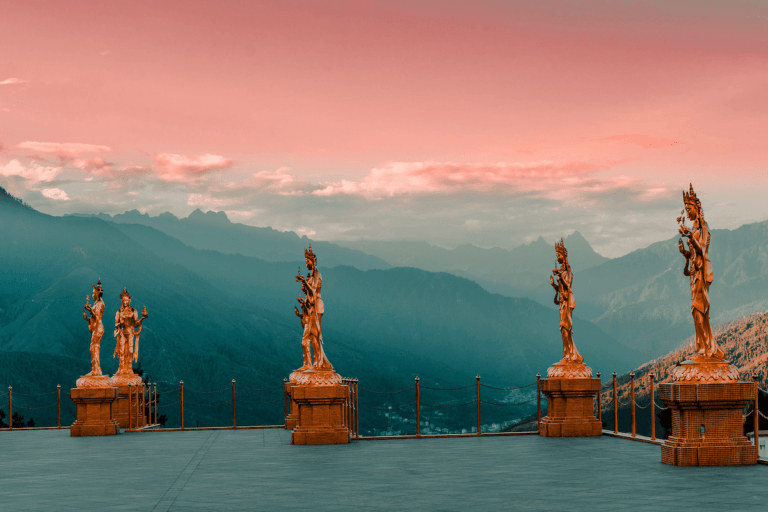
Here’s a fun photography trick: Sunset
Another opportunity for beautiful lighting is sunset. Two good rules of thumb: Find the “golden hour”, an hour after sunrise, and an hour before sunset, and find “blue hour” an hour before sunrise or an hour after sunset.
Want to give this tip a try? Join The Travel Yogi on the next Yoga Adventure to Bhutan. Psst, that’s where this photo was taken. You’ll have another sunrise photo opportunity on The Travel Yogi Galapagos Adventure when you go on an exclusive sunrise trip to the stunning Las Grietas. Seriously, google it. It’s insane.
3) Turn Grid Lines On (The Rule of Thirds)
Here’s a fun photography trick: Thirds
It’s called the “rule of thirds”. When you aim your camera at something beautiful, break the image up into three equal parts, either vertically or horizontally (or both!).
Try to align the subjects of your photo in those thirds. So, if you’re taking a photo of a boat in the ocean, try to fit the sky into the top third, and the boat in one of the bottom two-thirds with the ocean. What you don’t want to do is divide the photo in half, with the boat in the bottom half and the sky in the top half. Why not? Because photo geniuses say so! An easy way to determine where these lines are is to turn on the gridlines feature on your iPhone. To do that, go to Settings, click on Photos and Camera, and turn on Grid. You’re welcome.
4) Frame Your Photo

If you want to spice up a photo, consider framing it with something else. In the example above, we framed our subject with an archway. It really helps to establish the feel of the place, don’t ya think?
You can also give this framing technique a try when you visit the Tanah Lot Temple on our Yoga Adventure Retreat in Bali.
5) Use Leading Lines
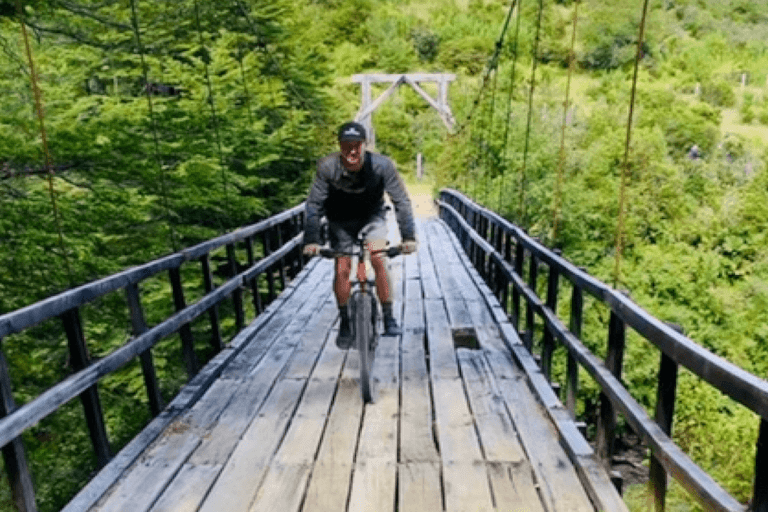
Another term you’ll hear a lot in the photography world is “leading lines”. These are natural lines that you can find around you that can help the viewer easily find the subject in the photograph. How? The viewer will naturally look at leading lines first when they look at a photo, and the lines will lead them to the subject.
The photo above (taken on The Travel Yogi’s Patagonia Yoga Adventure) is a perfect example of this technique! When you first look at the photo, your eyes are drawn to the yellow lines of the road, which point right to the mountains that the photo is all about.
6) Establish Perspective
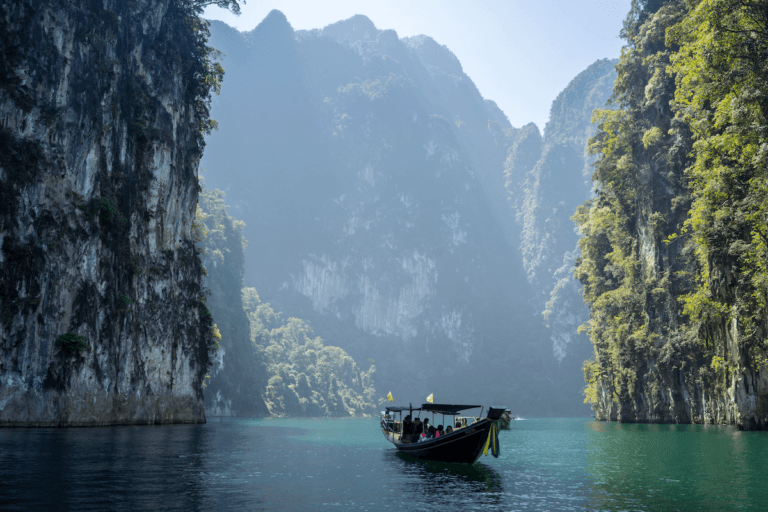
There’s nothing more frustrating than taking an underwhelming photo of an extraordinary view. This happens most when we try to photograph mountains or cliffs and the like. Most of the time, these photos fail because we didn’t incorporate the foreground, midground, and background. We didn’t help the viewer understand the scale of the subject, which is so apparent when you’re actually there in real life.
The next time you want to take a photo of a crazy massive mountain in the distance, look for something nearby that you can include in the photo to help establish the scale. In the example above, the canoe helps the viewer understand how massive the cliffs surrounding it are.
7) Add a Human Element
While landscape photography is an important part of any travel album, you will naturally want to add in some shots of you and your travel companions! Adding a human element to your photos can actually improve the quality of the photo. Humans can help establish scale (like we were just talking about) and can create an even stronger memory.
Need some inspiration for good human shots? Try snapping a photo while someone is doing something, like walking along a path or in a river, instead of just taking a static photo of them smiling. Consider using contrasting colors in your photos. If you’re in front of a green forest, why not wear some fabulous flaming hot red pants?Give this a shot during the full guided tour (with secret extras) of Iceland’s famous Golden Circle on The Travel Yogi Iceland Yoga Retreat.
8) Don’t Have Limp Arms!
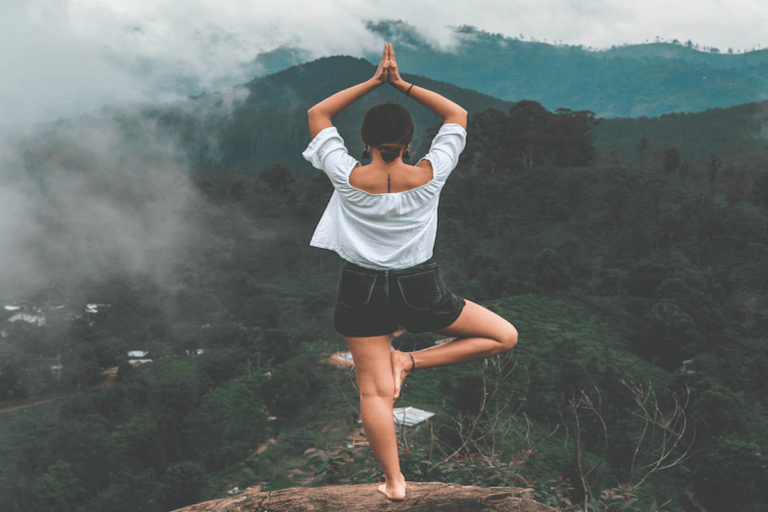
Seriously, don’t just let your arms hang out in your photo. Think: active arms! This will give your smartphone travel photography more energy.
You can use props to achieve this, like a water bottle or backpack. But, come on, we know there’s a better way to activate your arms. With a yoga pose! Try out this tree pose on The Travel Yogi’s Panama Yoga Adventure.
9) Use a Mini Tripod for Self-Shooting
We don’t all travel with buddies, but that doesn’t mean your photo game needs to suffer. There are a few items you can buy that can make it easier, like an iPhone tripod with a bluetooth remote. It’s not a big investment, and it makes it so much easier to get a good shot.
10) Learn How To Edit Your Smartphone Travel Photography
We guarantee that some of your favorite photos were edited—and that isn’t always a bad thing. Just no beauty-smudging y’all. And we aren’t saying you should use a cheesy Instagram filter, but with the help of a few edits, you can really transform your photos. You can crop the image, alter the color hues, white balance, contrast, exposure, saturation, and more on your laptop! Try downloading a free online photo editing tool to help. Like PicMonkey or Pixlr Editor.
Smartphone Travel Photography With The Travel Yogi
For those serious about taking epic travel photos, there’s no better opportunity than to join a Travel Yogi Yoga Adventure. Scratch your adventure itch, shoot the best smartphone travel photography of your life, and deepen your yoga practice. Check out all of the opportunities here.